
In the last post, we talked about the concept of Pooling Systems. What they do, why they’re useful, the fundamental different styles, etc.
We also hinted at a couple of Unity specific things, and promised we’d cover them in a later post… well, here we are! Let’s talk about making a good pooling system, and then we’ll start making one.
A Good™ Unity Pool
What makes a Good™ Unity Pool? Different people will have differing opinions on this, and over the years you’ll come up with your own, but for now, I’ll lay out mine to give you a head start.
Ease of Use
It should go without saying that we’d like all of our systems to be easy to use, right? So what does that mean in this case? What does an “easy to use” pool look like?
Well, for programmers “easy to use” basically translates to “as close to not using a pool as possible”. Why do I say that? Partly because the chances are high that you’ve decided to implement a pool, (and found this series) because you’re already halfway through development and you’ve noticed that instantiating objects is expensive. Then partly because your team is already comfortable with how instantiating objects currently works in your project, so it would be pretty good if the only code change needed is swapping Instantiate and Destroy with pool variants and having them behave as closely as possible.
How about everyone else? Who else will likely create regularly spawned objects you’d want to pool? Designers and VFX artists. Designers will create things like new projectile types, and VFX artists will create impact effects, explosions, etc. They should be able to add these things to the pooling system, so doing so needs to be straightforward. Adding a component or two to the prefab, and then adding the prefab to a list (which has pre-determined sensible defaults) should be our goal.
Flexibility
A flexible pooling system should place as few restrictions on the pooled objects as possible. There shouldn’t be any prefabs you couldn’t theoretically pool (there might be some that are hard to, and that’s fine, but it shouldn’t be the fault of the pooling system).
So what does that mean? You should be able to do most of the things with a pooled object you can with an Instantiated one.
Renaming it should be fine, deactivating it should be fine, disabling components should be fine, changing layers should be fine, reparenting it should be fine etc. As long as you can reset the state back to default (if needed), then there’s no limit.
The most difficult things to support are related to changing the structure of the instance itself. You probably shouldn’t support adding or destroying child objects, or components. You probably shouldn’t support reparenting child objects.
There are times when some of these difficult cases are needed and you can write case-specific code to handle the reset, it would just be very difficult to handle every permutation of these cases within the generic system.
Configurability
There are some obvious things you’ll want to configure, we covered them in the previous post: Default size, expandability, and hard limits. But for Unity specifically, we should talk about Active and In-active pools.
Like Instantiation and Destruction, Activation and Deactivation also have a cost. Sometimes, it’s a pretty high one. Sometimes disabling a component is cheap, but deactivating the whole GameObject is expensive. Sometimes disabling 10 components out of the 20 which might be on your GameObject is a pretty big saving.
I’ve seen a 1ms saving when switching an object spawn from a traditional pool to an active pool, on base PS4.

Did you know you don’t even have to disable most Renderer components? Just put it a few thousand units away and it’ll have a basically zero per frame cost, with a large reduction in activation costs. Rigidbodies are a similar story, but you also have to separate out the instances, so they can fall asleep.
But… Doesn’t Unity already have pools?
Yes. Yes, it does. Here they are.
I would argue they are not enough to be considered a whole pool “system”. They are closer to what I would consider to be the underlying implementation details, of a larger system.
With that in mind, let’s take a look and see if they hold up to the requirements we set out above:
Pros
- Can opt to store objects activated, rather than deactivated.
- Can edit the object in all the ways desired.
- Callbacks for every operation.
Cons
- The interface does not match
Object.Instantiate. - OnGet (the Awake equivalent) is called before the new state can be set.
- Allocations can happen beyond the max size, but they’ll be destroyed when returned. Not recycled.
Honestly, these are some pretty amazing pros. Most examples of Pools I see online use GameObject activation to determine if it’s available to spawn, it’s fantastic that it’s not the case here. That gives us the control we should always have over an instantiated object, and the ability to leave the objects active in the pool. Having callbacks when the object is added to or removed from the pool does give us control over handling specific components which may need resetting etc.
There are a few pretty serious cons here, though. We can work around the first two with the higher-level API, but extra allocations aren’t handled the way we’d like (in either of the styles we’d like). For me, this is enough reason to not use it, but if you’ve read the rest of these posts and decided that it’s fine for you and would save you some of the work, then go for it! You can do a lot worse.
The above only applies to GameObjects (and probably ScriptableObjects) though, Unity also has pools for other reference types, like Lists for example. For those types, I’d just use them as is.
Let’s make one!
Alright, let’s do this. We’re going to make a GameObject Pooling System which can serve as a reference implementation for your (and my) projects! We’ll start with the basics first, and build it out to the fully featured pool in the next post.
Step 1: The Interface
We’re going to start by making a MonoBehaviour to store our pools and instances. Why a MonoBehaviour? It doesn’t really have to be, but making it so gives us an easy place to store the currently pooled objects when they’re not in use. We can move the objects to be a child of the Pool and keep our hierarchy tidy.
We’ll also declare our first pair of functions:
using UnityEngine;

namespace Pool
{
    public class GameObjectPoolSystem : MonoBehaviour
    {
        public GameObject Instantiate(GameObject prefab, Vector3 position,
                                      Quaternion rotation, Transform parent)
        {
            return null;
        }

        public void Destroy(GameObject instance)
        {

        }
    }
}
Up front, we’ve decided on our interface, and it should be no surprise that it is the same as Unity’s Object.Instantiate. Object.Instantiate does have other overloads, but they can be made as a wrapper around this function, so I’ll not cover their specifics here.
Step 2: The Config
We’ve decided earlier that a whole system should just be a wrapper around a single object pool, but before we jump right in and create them, we should define the data to configure them first. Let’s create a Serialisable class to hold that config.
[Serializable]
public class SingleObjectPoolSettings
{
    public GameObject Prefab;
    [Min(1)] public int DefaultSize = 5;
}
This is all we need for the basic pool setup. We need to know what we’re pooling, and what the initial size of the pool is.
Let’s also add a serialised member variable to our GameObjectPoolSystem to store this config data.
[SerializeField] private List<SingleObjectPoolSettings> m_poolSettings = new ();Step 3: The Pools
We have our pools configured now, so let’s make a class for the pools themselves, this time we don’t need to make it serialisable.
public class SingleObjectPool
{
    private SingleObjectPoolSettings m_settings;
    private Stack<GameObject> m_availableInstances;
    private Transform m_container;

    public SingleObjectPool(SingleObjectPoolSettings settings, Transform container)
    {
        m_settings = settings;
        m_availableInstances = new Stack<GameObject>(Settings.DefaultSize);
        m_container = container;
    }
}
Again, the data required for the basic pooling system is very minimal. We need the pool’s configuration and a collection containing the pooled objects themselves.
I’ve chosen a Stack here because as a data container, it has the potential for the most efficient additions and removals. A List using Add and RemoveAt should be just as efficient. They have a potential downside during development, though. If an object ends up in a bugged state when added to the pool, it will be the next one taken out again. You’ll see that bugged object a lot. It would definitely push you to fix the bug, but would be very annoying while it exists.
Which is why another good candidate would be a Queue. It’s not a significantly slower collection type 99% of the time, and when there is a bugged object you’ll have to go through the whole list again before you see it.
We now need to add a field to store these pools. But we should also remember that our Instantiate function emulates Object.Instantiate, meaning it just takes in a GameObject prefab and we’re expected to work with it. We need to be able to find out SingleObjectPool from the prefab. The best case for this is of course a Dictionary.
private Dictionary<GameObject, SingleObjectPool> m_pools = new ();
GameObject provides an implementation for GetHashCode(), which is just a wrapper around GetInstanceID() and is unique per session. This makes it perfectly fine to use as a Key in a Dictionary, as long as you don’t need to trust it between runs (which we don’t).
Step 4: Initialising
We now need to create and warm up our pools.
Creating them is simple. We loop through our settings in Awake, create a SingleObjectPool and add it to our Dictionary. For the container object, we’ll just make a GameObject named after our prefab and set it as a child of our pooling system.
private void Awake()
{
    foreach (var settings in m_poolSettings)
    {
	var container = new GameObject($"{settings.Prefab.name} Pool")
	{
	    transform =
	    {
	        parent = transform
	    }
	};
        m_pools.Add(settings.Prefab, new SingleObjectPool(settings), container.transform);
    }
}
Warming up the pool isn’t that difficult either. For this basic version, we need to:
- Fill the pool to the default size
- Reparent the instance to keep our hierarchy clean
- Deactivate the instance (we’ll make this optional later!)
Let’s create a function called Expand and add it to our SingleObjectPool. It takes in the target size as a parameter, which will let us reuse it later when handling expansion.
private void Expand(int newSize)
{
    while (m_availableInstances.Count < newSize)
    {
        var instance = Object.Instantiate(m_settings.Prefab, m_container);
        instance.SetActive(false);

        m_availableInstances.Push(instance);
    }
}
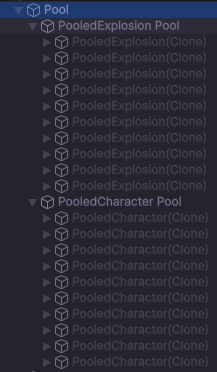
That’s it! If you were to add this into a scene with some pooled objects added, you’d be able to see them in your hierarchy.
Step 5: Cleanup
It’s a good idea at this point to also handle the shutdown or cleanup process of the pool. Strictly speaking, it isn’t required yet, when the Pool is Destroyed so will all of its children. But that won’t be the case for long, so let’s start the support now.
We’re going to implement the IDisposable interface on SingleObjectPool, we’ll simply empty the stack of available instances, and Destroy them all.
public class SingleObjectPool : IDisposable
{
    //...

    public void Dispose()
    {
        while (m_availableInstances.TryPop(out var instance))
        {
            Object.Destroy(instance);
        }
    }
}
We should then Dispose all of our SingleObjectPools when our Pool System is being destroyed.
private void OnDestroy()
{
    foreach (var pool in m_pools.Values)
    {
        pool.Dispose();
    }

    m_pools.Clear();
}
For now this is all we need, but we’ll come back to this later as we add more functionality.
Step 6: Instantiation
Onto the good stuff! We made our interface way back in Step 1, let’s implement the Instantiate function.
First, we’ll add a GetInstance method to our SingleObjectPool, it’s implementation is simple, but the order of operations matters. When Instantiating a GameObject through traditional means, the flow of operations is as follows:
- Instance created
- Position, Rotation and Parent are set
Awakeis called for all componentsOnEnableis called for all enabled components- Instance is returned from
Instantiate Startis called later in the frame for all enabled components
We want to emulate this as best we can, which for now means we ensure the position, rotation and parent are all set before the instance is activated and returned.
public class SingleObjectPool : IDisposable
{
    //...

    public GameObject GetInstance(Vector3 position, Quaternion rotation, Transform parent)
    {
        var instance = m_availableInstances.Pop();
        var instanceTransform = instance.transform;

        instanceTransform.SetParent(parent);
        instanceTransform.SetPositionAndRotation(position, rotation);

        instance.SetActive(true);

        return instance;
    }

    //...
}
We can now implement the body of our Instantiate. We use the provided prefab to find the specific pool we’re after, call GetInstance, and return the result.
public GameObject Instantiate(GameObject prefab, Vector3 position, Quaternion rotation, Transform parent)
{
    if (m_pools.TryGetValue(prefab, out var pool))
    {
        return pool.GetInstance(position, rotation, parent);
    }

    return null;
}
So far so simple. We do have a couple of extra cases we need to handle, but first, we need to be able to return an active Instance to the pool.
Step 7: Destruction
Let’s add a method to the SingleObjectPool class to handle returning an object to the pool. Again, we need to do our best to emulate the order Unity would normally do it. This means we shouldn’t deactivate, move or reparent the object until the components on the object have received appropriate callbacks.
public class SingleObjectPool : IDisposable
{
    //...

    public void ReturnToPool(GameObject instance)
    {
        instance.SetActive(false);

        var instanceTransform = instance.transform;
        instanceTransform.SetParent(m_container);

        m_availableInstances.Push(instance);
    }

    //...
}
Now we just need to call this function from our Destroy function, right? Not so fast!
How do we know which pool to call it on? Destroy takes an object instance, but m_pools is keyed on prefabs. We need a way to bridge that gap.
One method I’ve seen in the past is having a second dictionary, mapping instances to pools. This is pretty simple and uses a pattern we’re already familiar with, but is not what we’re going to go with.
We’re going to create a new file, with a new MonoBehaviour called PooledGameObject. Its purpose, for now, will be to exist on every pooled instance and hold a reference to the pool which spawned it.
using UnityEngine;

namespace Pool
{
    [DisallowMultipleComponent]
    public class PooledGameObject : MonoBehaviour
    {
        public GameObjectPoolSystem.SingleObjectPool OwningPool { get; private set; }

        public void Initialize(GameObjectPoolSystem.SingleObjectPool owningPool)
        {
            OwningPool = owningPool;
        }
    }
}
Later this approach will give us a lot more tools to work with, it will be the container for pooled instance information. Because of this, we’ve made sure we can only ever have one of these on an object (if there was a straightforward way to force it to only ever exist on the root of a prefab, I would!)
We now need to initialise this component for every object instance in our pools, we do that in the Expand method of SingleObjectPool.
public class SingleObjectPool : IDisposable
{
    //...

    private void Expand(int newSize)
    {
        while (m_availableInstances.Count < newSize)
        {
            var instance = Object.Instantiate(m_settings.Prefab, m_container);
            instance.SetActive(false);

            if (!instance.TryGetComponent(out PooledGameObject pooledGameObject))
            {
                pooledGameObject = instance.AddComponent<PooledGameObject>();
            }

            pooledGameObject.Initialize(this);

            m_availableInstances.Push(instance);
        }
    }

    //...
}
The idea is that the root of the prefab instance must have a PooledGameObject component, and this component is allowed to exist already on the prefab (That is, in fact, preferred as that will give us nice options for configuration in the future). Allowing it to be added at runtime though helps with your ease of use, non-programmers don’t need to care about it for basic objects.
With this new guarantee of ours, we should now be able to fairly simply implement the Destroy function.
public void Destroy(GameObject instance)
{
    if (instance.TryGetComponent(out PooledGameObject pooledGameObject))
    {
        pooledGameObject.OwningPool.ReturnToPool(instance);
    }
}
Step 8: Corrections
We still had a few code paths to clean up after we wrote our Instantiate code, and we’re now in a position to do so.
The biggest one being that our clean up code is currently broken when there are any active instances in the world. Not only are we not cleaning them up, but they also will eventually be destroyed and cause a MissingObjectException to be fired.
We need a way to force all currently active instances back into the pool before clearing it out, which means we need a way to reference active instances in the first place. I’m opting to use a HashSet for this purpose, due to its constant time insertions and removals, but as long as you can Add and Remove a GameObject to a container, it should work just as well.
public class SingleObjectPool : IDisposable
{
    private SingleObjectPoolSettings m_settings;
    private Stack<GameObject> m_availableInstances;
    private HashSet<GameObject> m_activeInstances;
    private Transform m_container;

    public SingleObjectPool(SingleObjectPoolSettings settings, Transform container)
    {
        m_settings = settings;
        m_availableInstances = new Stack<GameObject>(m_settings.DefaultSize);
        m_activeInstances = new HashSet<GameObject>(m_settings.DefaultSize);
        m_container = container;

        Expand(m_settings.DefaultSize);
    }

    public GameObject GetInstance(Vector3 position, Quaternion rotation, Transform parent)
    {
        var instance = m_availableInstances.Pop();
        m_activeInstances.Add(instance);

        //...
    }

    public void ReturnToPool(GameObject instance)
    {
        //...

        m_activeInstances.Remove(instance);
        m_availableInstances.Push(instance);
    }

    //...
}
Now that we have this list, we can add a new method called ReturnAllInstances, which forces all currently active instances back into the pool. We can then call this method from Dispose.
We need to loop through the collection of active instances and return them to the pool, but if we do that in a naive way, we’ll invalidate our Enumerator and throw an exception. To get around this, we clone the collection into a separate List<GameObject> and iterate over that instead. You can see we’re even using one of Unity’s built-in collection pools! This could save us an expensive allocation somewhere down the line.
We should make this new method public as it has some good use cases when tearing down a level when using a global pool.
public class SingleObjectPool : IDisposable
{
    //...

    public void ReturnAllInstances()
    {
	using (ListPool<GameObject>.Get(out var activeList))
        {
            activeList.AddRange(m_activeInstances);
            foreach (var instance in activeList)
            {
                ReturnToPool(instance);
            }

            activeList.Clear();
        }
    }

    public void Dispose()
    {
        ReturnAllInstances();

        while (m_availableInstances.TryPop(out var instance))
        {
	    Object.Destroy(instance);
	}
    }

    //...
}
Our next case to handle is in our GetInstance method. What happens when the pool has been exhausted? We’ve decided that our default should be to expand the pool, but right now it’ll just throw an exception upon the call to Pop.
Let’s handle the case where our pool is empty by making it bigger, but more importantly, logging that we have done so! Ideally, this will give us important information we can use to tune the sizes of our pools later.
First, we need a more accurate way to measure the current size of our pool, we’ll add a Capacity property to the SingleObjectPool class which is the sum of the available and active instances.
public class SingleObjectPool : IDisposable
{
    private int Capacity => m_availableInstances.Count + m_activeInstances.Count;

    //...
}
Then, we correct the while loop in Expand to use this new property.
public class SingleObjectPool : IDisposable
{
    //...

    private void Expand(int newSize)
    {
        while (Capacity < newSize)
        {
            //...
        }
    }

    //...
}
We then call this corrected Expand method to increase the size of our pool by 1, making sure to not forget our log!
public class SingleObjectPool : IDisposable
{
    //...

    public GameObject GetInstance(Vector3 position, Quaternion rotation, Transform parent)
    {
        if (m_availableInstances.Count == 0)
        {
            Expand(Capacity + 1);
            Debug.LogWarning($"{m_settings.Prefab.name} pool size increased to {Capacity}");
        }

        //...
    }

    //...
}
Our final case to handle has no correct answer, so we’ll discuss the two best options and implement the simplest.
What do we do when someone calls Pool.Instantiate with a prefab which isn’t configured to be poolable? Or when they call Pool.Destroy with an instance which isn’t from a pool? Right now we return null, and do nothing, respectively, which I don’t believe to be sensible choices.
In my experience, the best options available to us at this point are Log and fallback to default Unity Instantiate/Destroy or Log, create a pool on the fly and use that.
I’m going to implement the first option here for a single reason: Having it means you can, right now, replace every single call to Object.Instantiate/Destroy with Pool.Instantiate/Destroy with no change in behaviour, but plenty of logs to help direct how you configure your pools.
public GameObject Instantiate(GameObject prefab, Vector3 position, Quaternion rotation, Transform parent)
{
    if (m_pools.TryGetValue(prefab, out var pool))
    {
        return pool.GetInstance(position, rotation, parent);
    }

    var instance = Object.Instantiate(prefab, position, rotation, parent);
    Debug.LogWarning($"Attempting to Instantiate {prefab.name} without a valid pool." +
                     $"\nFalling back to default behaviour." +
                     $"\n[{instance.GetInstanceID()}]");
    return instance;
}

public void Destroy(GameObject instance)
{
    if (instance.TryGetComponent(out PooledGameObject pooledGameObject))
    {
        pooledGameObject.OwningPool.ReturnToPool(instance);
    }

    Debug.LogWarning($"Attempting to Destroy non-pooled object: " +
                     $"\n[{instance.GetInstanceID()}] {instance.name}." +
                     $"\nFalling back to default behaviour.");
    Object.Destroy(instance);
}
Step 9: OnSpawned and OnDespawned
We’re in the final stretch for our initial pooling system!
Now that we’re re-using GameObjects, we won’t be able to rely on Awake, Start or OnDestroy to manage initialisation or cleaning up our instances. They still have their uses, but they’re better for managing references within the prefab.
OnEnable and OnDisable aren’t ideal either, there are valid reasons to enable and disable components all the time, so you don’t want to be doing things like resetting your current HP in there.
So what do we use to reset or set up our custom components within a pool? We need to get a message to every component which cares about it, and realistically we have 2 options: SendMessage or an interface.
SendMessage has some performance and typing issues, and we already have a perfectly good place to store a list of everything matching an interface on a pooled object… so I prefer that option.
First, we’re going to start putting our PooledGameObject to work. We’ll add empty OnSpawned and OnDespawned methods which we can call from our pool.
public class PooledGameObject : MonoBehaviour
{
    //...

    public void OnSpawned()
    {

    }

    public void OnDespawned()
    {

    }
}
We need to add calls to both of these and the semantics of when they are called matters.
We can either try and emulate a pre-existing Unity call or define our own. Should we choose to emulate something, then I’d probably go with Awake and OnDestroy, meaning we trigger OnSpawned after position data has been set, but before OnEnable will be called and OnDespawned after OnDisable, while the position and parentage are still valid.
However we have a problem, when spawning an object for the first time, it is active during Awake. That would not be the case for us, and it matters in some cases.
To account for this, we’re going to decide on our own semantics and call OnSpawned right before we return from GetInstance, after it’s already been activated. We’ll then call OnDespawned as the first thing in ReturnToPool before it has been deactivated.
public class SingleObjectPool : IDisposable
{
    //...

    public GameObject GetInstance(Vector3 position, Quaternion rotation, Transform parent)
    {
        //...

        instance.SetActive(true);

        var pooledObject = instance.GetComponent<PooledGameObject>();
        pooledObject.OnSpawned();

        return instance;
    }

    public void ReturnToPool(GameObject instance)
    {
        var pooledObject = instance.GetComponent<PooledGameObject>();
        pooledObject.OnDespawned();

        instance.SetActive(false);

        //...
    }

    //...
}
Next, we need to create our interface. This is the interface every component which cares about being pooled (i.e. has a state which needs to be reset) will implement, and it’s very simple.
namespace Pool
{
    public interface IPoolable
    {
        void OnSpawned();
        void OnDespawned();
    }
}
With just this interface we can reset values back to defaults, ensure the components which need to be initially disabled are handled, fetch external references, etc.
Now back in PooledGameObject, we need a list of all the IPoolables in the prefab instance, and since we support adding the PooledGameObject component at the last minute, we can’t rely on a human to add them to the list for us (humans make mistakes anyway, we can’t trust those guys).
What we should do is when the PooledGameObject.Initialise is called, we get every IPoolable on the prefab and store them. We know Initialise is called after the prefab has finished instantiating, because we call it ourselves, so we’re certain that everything is registered by this point. Make sure to also grab the inactive components!
(Nitpick GetComponentsInChildren is weirdly named, as it also gets all components on the current GameObject!)
public class PooledGameObject : MonoBehaviour
{
    public GameObjectPoolSystem.SingleObjectPool OwningPool { get; private set; }

    private List<IPoolable> m_poolables = new();

    public void Initialize(GameObjectPoolSystem.SingleObjectPool owningPool)
    {
        OwningPool = owningPool;
        m_poolables.AddRange(GetComponentsInChildren<IPoolable>(true));
    }

    //...
}
The final step, iterate over our poolables and pass on the OnSpawned and OnDespawned messages.
public class PooledGameObject : MonoBehaviour
{
    //...

    public void OnSpawned()
    {
        foreach (var poolable in m_poolables)
        {
            poolable.OnSpawned();
        }
    }

    public void OnDespawned()
    {
        foreach (var poolable in m_poolables)
        {
            poolable.OnDespawned();
        }
    }
}
At this point, you might be wondering why PooledGameObject isn’t an IPoolable. Since it technically implements the interface. That’s simply because if we did, then GetComponentsInChildren<IPoolable> would return it, and we’d add ourselves to our own list, and then call ourselves later on… which would cause an infinite recursion and throw an exception!
Step 10: You Have A Pool!
Congratulations! You have a shippable GameObject pool! Let’s demonstrate how to use it with a simple helper IPoolable.
The idea of the component is that when it’s spawned, it starts playing the attached ParticleSystem, it then listens for the message that the ParticleSystem has finished and returns it back to the pool.
This is a perfect example of OnSpawned needing to be called after the object is already active, if we’d emulated Awake in this case then Play would be called on an inactive ParticleSystem, and do nothing.
using UnityEngine;

namespace Pool.Utility
{
    [RequireComponent(typeof(PooledGameObject))]
    [RequireComponent(typeof(ParticleSystem))]
    public class PooledOneShotVFX : MonoBehaviour, IPoolable
    {
        private ParticleSystem m_particleSystem;
        private PooledGameObject m_pooledObject;

        private void Awake()
        {
            m_particleSystem = GetComponent<ParticleSystem>();
            m_pooledObject = GetComponent<PooledGameObject>();
        }

        private void OnParticleSystemStopped()
        {
            m_pooledObject.ReturnToPool();
        }

        public void OnSpawned()
        {
            m_particleSystem.Play(true);
        }

        public void OnDespawned()
        {
            m_particleSystem.Stop(true, ParticleSystemStopBehavior.StopEmittingAndClear);
        }
    }
}
We have added a ReturnToPool function to our PooledGameObject to make this a little smoother, the implementation is just this:
public class PooledGameObject : MonoBehaviour
{
    //...

    public void ReturnToPool()
    {
        OwningPool.ReturnToPool(gameObject);
    }
}
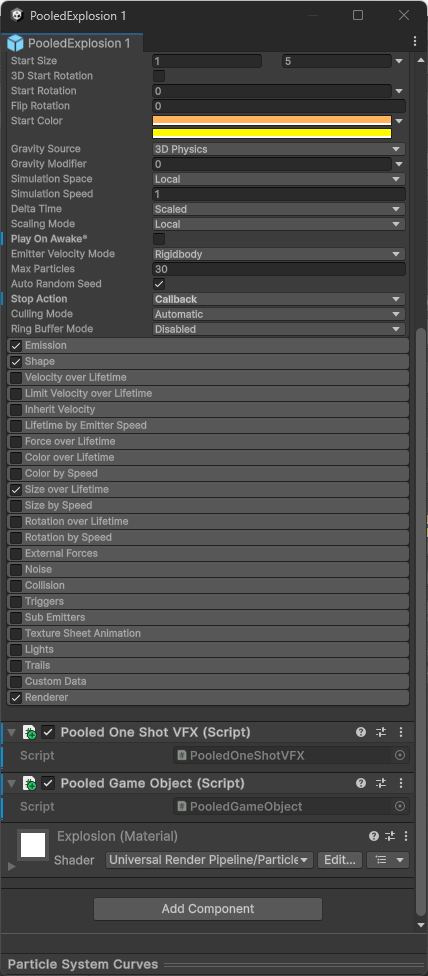
You’d then add this component to your various one-shot ParticleSystems (explosions are a good example), and make sure the Stop Action is set to Callback.
Next…
This has been a long post, but we’re not done with our pool yet! In the next post, we’ll add some of the advanced features we talked about earlier.